Perspective and Crop
Perspective and Crop of a 3D world with a 2D photograph sometimes requires photo manipulation.
Imaging a 3D World
Embarking on the journey of imaging a three-dimensional world through the lens of a photograph is akin to wielding a painter’s brush on a canvas, for it often calls for a touch of artful manipulation. In the realm of photographic fine-tuning, the spectrum ranges from elementary adjustments like aligning the horizon or refining composition through cropping, to the more intricate choreography of correcting perspective.
At Mansfield Photography, we pride ourselves on meticulous scrutiny, automatically inspecting and refining each image we capture. However, there are instances when the inherent imperfections of the world demand preservation in their unaltered form, and we wholeheartedly oblige.
Yet, when the call for perspective correction arises, our artistic sensibilities are summoned to choreograph a dance of visual transformation. These adjustments typically come to the fore when we gaze upon structures or compositions characterized by bold lines and defined geometry. It is in these moments that the fascinating dichotomy between the three-dimensional reality our eyes perceive and the two-dimensional representation of a photograph unfolds.
Imagine, for instance, a towering, perfectly rectangular skyscraper standing at attention, 20 stories tall, as you stand 300 feet away, gazing squarely at its facade. In the three-dimensional tapestry of reality, your brain interprets this edifice as flawlessly rectangular. However, when you trace the lines upward from both the left and right sides of the building, a subtle revelation emerges. The leftward line possesses a slight inward angle, as does its counterpart on the right. Should you continue these imaginary lines, they eventually converge—what we in photography refer to as converging lines. It’s a striking phenomenon, where the nuances of our eyes’ perception differ significantly from the cold precision of the camera’s lens.
In the realm of photography, the camera refrains from any artistic reinterpretation. It captures these converging lines with unwavering precision. Thus, when we embark on a photographic odyssey that leads us to capture a sprawling cityscape or the interior of a majestic building from a slightly off-kilter angle, the resulting image can appear askew.
This is precisely where the artistry of perspective correction takes center stage—a process where we endeavor to rectify the visual discord that occasionally plagues our photographic canvases. The transformations are eloquently depicted in a series of before and after images, a testament to the captivating dance between the three-dimensional world as perceived by our eyes and the two-dimensional story told by our photographs.
Example 1
The image below is an untouched photo taken of the Assembly Room from Independence Hall in Philadelphia. This image has a few things that need adjustment.
- It needs to be cropped as there is an arm of person in the far left-middle. Besides the arm, it may be advantageous to center the image a little better.
- The image was taken from an angle. If you look at the back wall and follow some lines up, they lean toward the right. We will want to correct that.
- The image also needs color and light corrections.
The adjusted image is the result after fixing the issues. The crop is nice, the lines on the back wall are straight, and it has good color & light.
Image that needs to be adjusted:

Adjusted Image:

Example 2
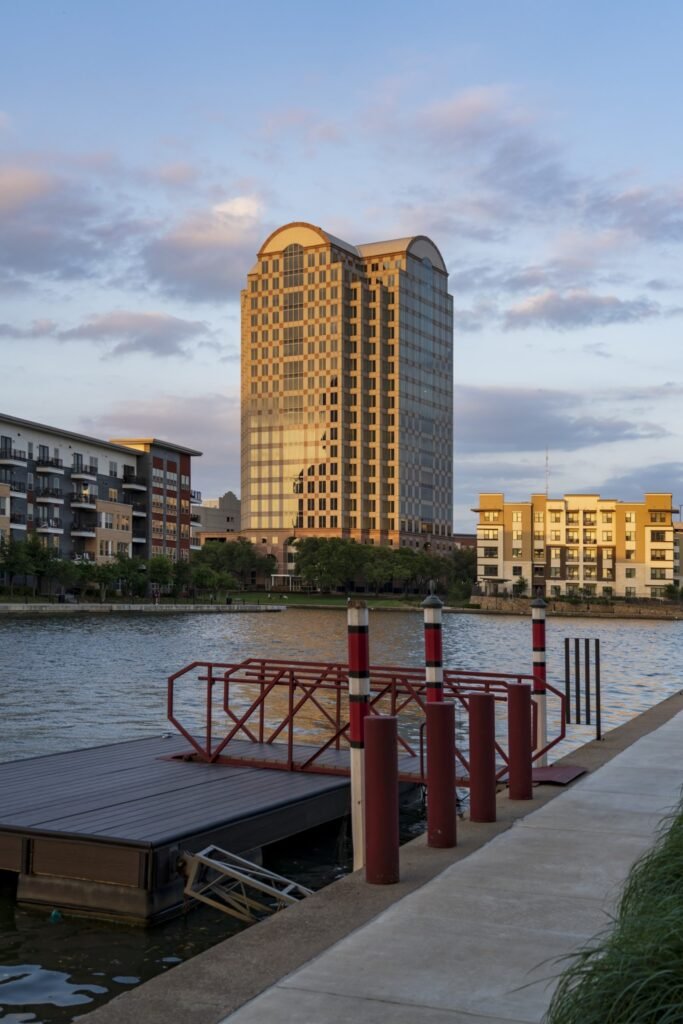
This is an image from Lake Carolyn in Irving Texas. The building is about a 20-story building. The image was taken at an angle from the building, so it appears to be leaning to the right. This image needs to be cropped as well as needing the perspective corrected. Add light adjustments / color grading and you have a fine image in the end.
Image that needs to be adjusted:

Adjusted Image:

Example 3
We’re back at Independence Hall in Philadelphia, but outside in the courtyard. This image was taken close to the building, looking up. It was a handheld shot, so not only is the perspective off, but it is not straight.
This will need crop, straightening, as well as a perspective fix. The problem here is the image was taken so close, fixing the perspective will not make it look 100% right, but should look nice.
In the final image we adjusted the light & color and decided to remove the tree since it was distracting from the subject (it didn’t add any value to the composition).
Image that needs to be adjusted:

Adjusted Image:


