Object & Artifact Removal
– Sometimes it is desirable to remove objects and/or artifacts from an image.
Object and Artifact Removal: A Simple or Challenging Task?
The process of removing objects and artifacts can vary in complexity. There exist several techniques for accomplishing this task, but we primarily employ two methods. Continue reading to discover these techniques and to see examples of before and after images.
Object Removal Method #1
When you find yourself dealing with dynamic elements like people or animals that you’d prefer not to have in your photograph, one effective approach is to capture multiple identical shots of your subject. The magic happens in post-processing, typically through software like Photoshop. Here’s how it works:
- Multiple Image Stacking: Gather a series of shots with your camera, ensuring that your subject remains the same while the people or animals move around. Import these images into Photoshop and stack them together as layers.
- Selective Erasure: Now, for each stacked image, use the eraser tool to meticulously remove the unwanted individuals (people or animals) from that particular frame. Continue this process for each layer.
- Clean Composition: As you erase the subjects from each layer, what remains is the pristine background, free from any distracting elements. When you’ve gone through all the layers, you’ll be left with a clean, composed image devoid of unwanted objects.
While this technique is often quite effective, there may be instances where it doesn’t yield the desired results, as illustrated in Example 2 below.
In cases where the multiple image stacking and erasing approach falls short or cannot be applied, we turn to our second method for handling these challenges.
Object Removal Method #2
In cases where the previous method proves inadequate for the task at hand, or when the image contains stubborn artifacts that require removal, we turn to method two—a meticulous, manual approach that demands both skill and precision.
The essence of this technique involves the surgical removal of each undesired object or artifact, followed by the painstaking process of rebuilding the affected portions of the image to seamlessly blend with the surrounding elements, ensuring a flawlessly realistic appearance.
While Adobe Photoshop provides an array of powerful tools for object and artifact removal, including more recent AI-driven innovations, their effectiveness can be somewhat limited. When the object or artifact is relatively simple in nature, Photoshop’s tools can yield impressive results. However, when confronted with intricate or complex scenarios, their limitations become apparent.
Nevertheless, we always initiate our journey in Photoshop, utilizing its capabilities to streamline the initial stages of object and artifact removal. However, in situations demanding a higher degree of finesse and realism—particularly when the goal is to create an image where any trace of intervention is imperceptible even under close scrutiny—we are prepared to embark on a journey of image reconstruction, sometimes down to the pixel level. Our ultimate aim is to craft a final product that invites viewers to zoom in, only to discover that no object was ever present, leaving them in awe of the seamless, undetectable transformation.
Example #1:
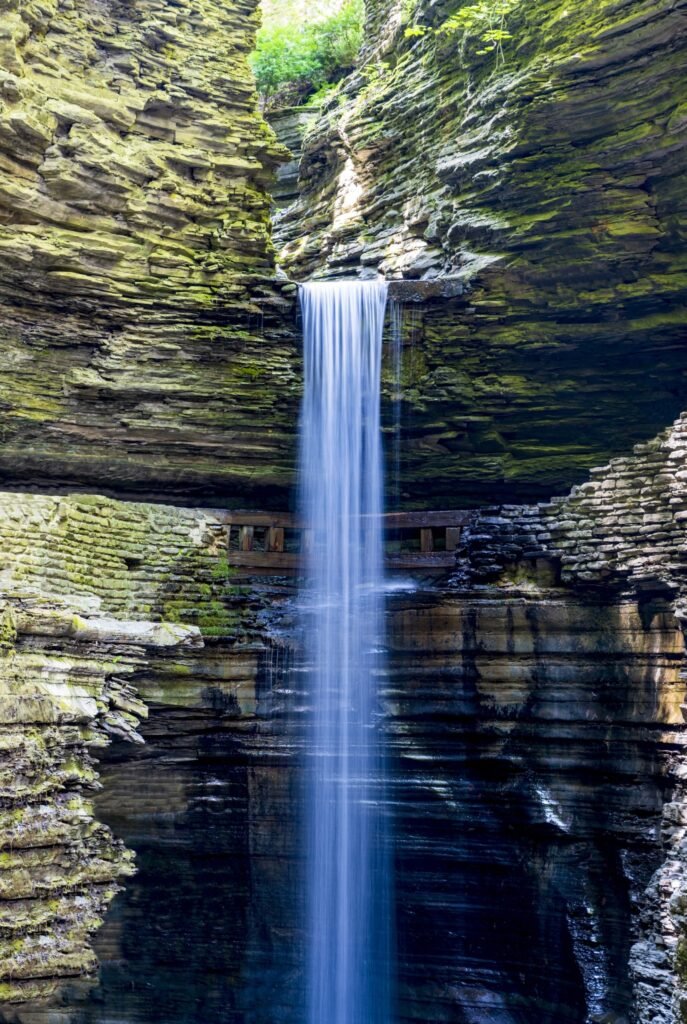
This mesmerizing waterfall presented a unique challenge, as it seemed to attract a constant stream of people wandering back and forth. Waiting for an uninterrupted moment to capture a pristine, person-free image would have required endless patience. This is where we employed the classic technique described earlier: taking a series of photos and stacking them together while painstakingly removing each individual. The result was splendid, as you’ll witness in the processed image.
However, it’s worth sharing a hearty chuckle over an amusing oversight. As we focused intensely on obtaining these images to stack and erase the people passing by the waterfall, we somehow missed the presence of a lone man seated in the bottom left corner of every single frame! It’s almost comical how we overlooked him.
In the end, we found ourselves faced with the task of manually removing this lone individual from the bottom left corner and reconstructing the scene. While we aren’t entirely satisfied with the outcome, it’s not a complete disappointment—just not quite up to our usual standards.
If you’re curious about the blurry appearance of the people, it’s because we deliberately used a slow shutter speed to create a dreamy, misty effect in the water, fully aware that we would later remove the people from the image.
BEFORE

AFTER
Example #2:
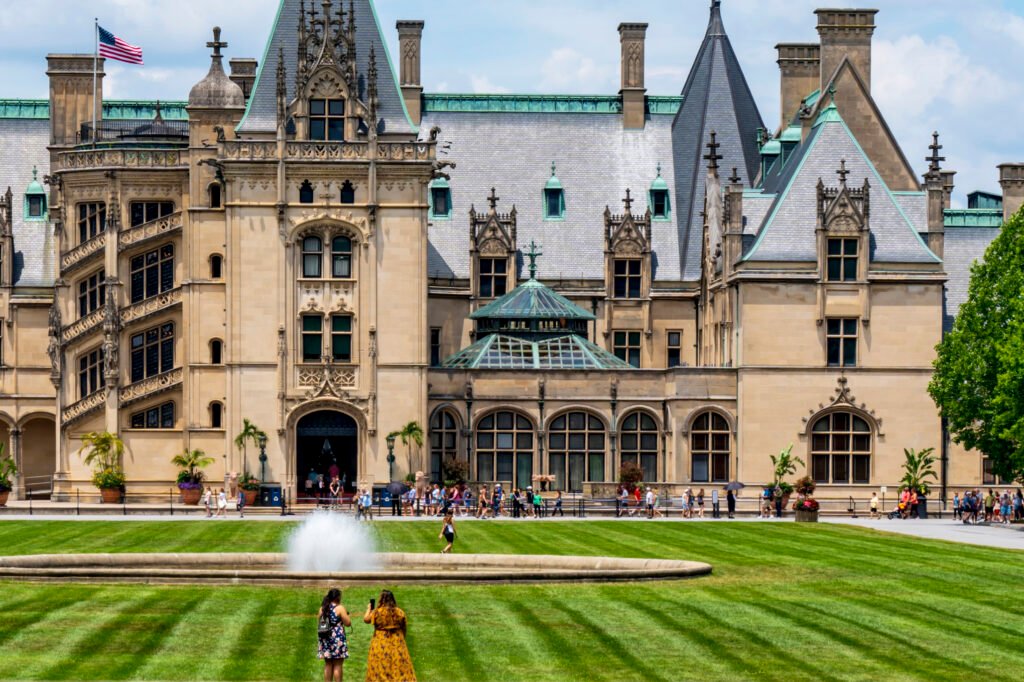
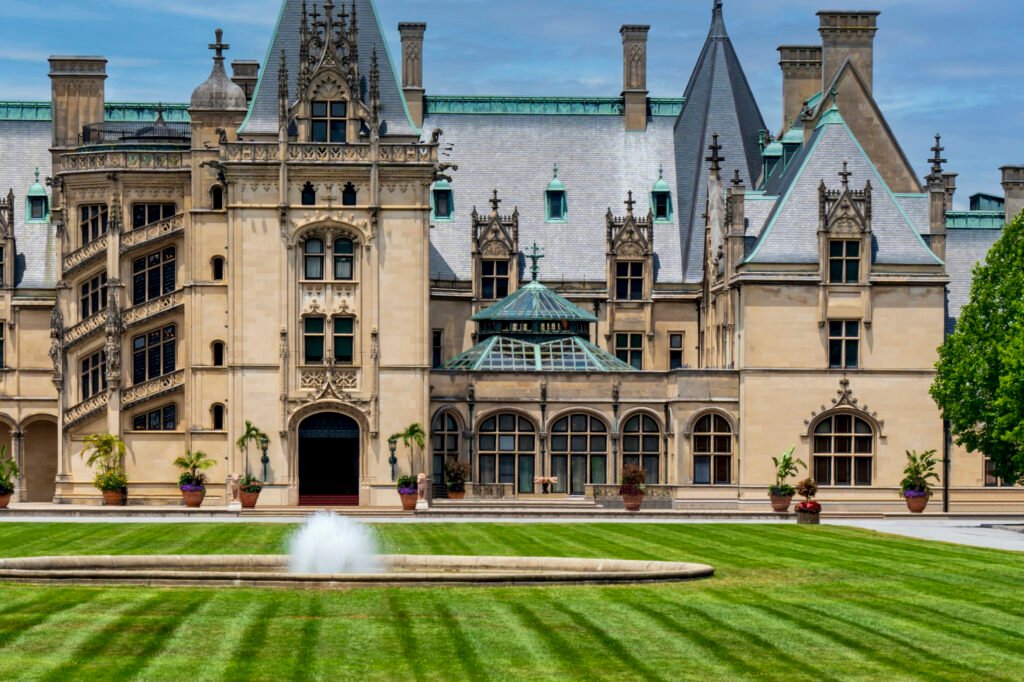
This image is a cutaway of the magnificent Biltmore estate in Asheville, North Carolina. Our primary objective here was to capture the grandeur of the house itself, undisturbed by the bustling presence of tourists in the foreground. Unfortunately, the area around the entrance, extending all the way to the right of the frame, was consistently crowded with visitors. In this particular scenario, employing the technique of taking multiple images and stacking them would prove to be futile. Hence, the only viable solution was the meticulous manual removal of every single individual seen in the ‘before’ picture.
Visualize the painstaking process of erasing each person from the frame—each removal akin to removing a piece from a complex jigsaw puzzle. As these figures disappeared, the house, with its intricate architecture and charming details, had to be meticulously reconstructed, brick by brick, in the areas where the people once stood. This laborious effort ensured that the resulting image retained its lifelike quality, appearing as though it had been captured in a serene moment void of any distractions.
Beyond people, our attention to detail extended to other elements in the scene. We eliminated the presence of unsightly garbage cans in front of the doors, bid farewell to the fluttering flag in the upper left corner, and even eradicated the chain link fence that spanned the entire width of the image from left to right. The result is a transformed image that showcases the Biltmore estate in all its splendor, free from the intrusions that had initially cluttered the scene.
