Perspective and Crop in Photography
– Mastering the Art: A Beginner’s Guide.
Capturing the world in a photograph can feel magical, but understanding how to portray a three-dimensional scene in a two-dimensional image can take a bit of practice. Perspective and cropping play essential roles in shaping how an image feels and flows, and learning a few tricks in these areas can make your photos more compelling and visually balanced. Here’s a guide to getting started with perspective and cropping techniques, designed to help beginner photographers make the most of their camera.
Understanding Perspective in Photography
When we look at the world with our eyes, we naturally perceive depth, scale, and distance thanks to our three-dimensional perspective. Cameras, however, flatten this view into two dimensions, capturing lines and angles exactly as they appear from where the camera is positioned. This sometimes creates a visual distortion known as “converging lines,” especially noticeable in photos of tall structures or scenes with distinct geometric elements.
For instance, imagine standing in front of a tall skyscraper, looking straight up. In person, the building looks rectangular, with parallel sides. But when you snap a photo, the sides may appear to angle inward as they rise. This phenomenon, called perspective distortion, can make buildings and other tall subjects look like they’re leaning, which might not match the reality you want to convey.
Why Perspective Matters
Perspective is an important element in creating realistic and visually pleasing photographs.
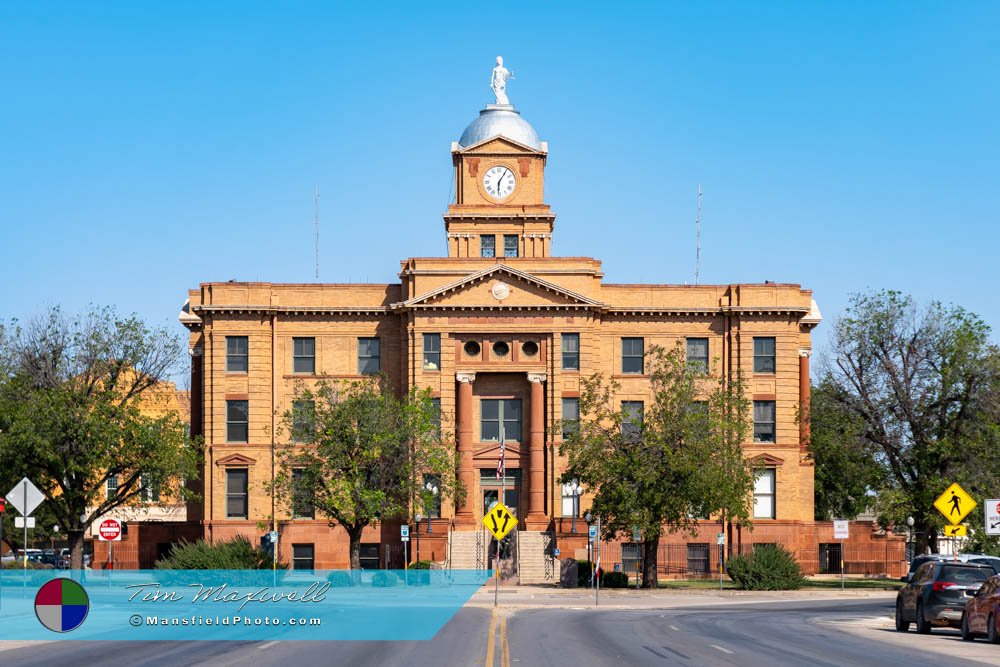
Correcting perspective can bring a more accurate representation of what your eyes perceive, especially in architectural photography, where symmetry and straight lines are often desirable. Mastering this technique helps create images that feel more balanced, appealing, and professional.
The Basics of Perspective Correction
There are a few straightforward ways to correct perspective distortion in your photos:
- Shoot from a Different Position
Sometimes, simply changing where you stand can help reduce distortion. If possible, move back and use a zoom lens, which can help minimize the angle and keep lines straighter. - Use a Tilt-Shift Lens
For serious architectural photographers, tilt-shift lenses allow the camera to maintain parallel lines while still capturing the entire structure. However, these lenses can be expensive and might not be practical, especially when there are post-processing tools readily available. - Edit in Post-Processing
Most photographers correct perspective distortion during editing. Software like Adobe Lightroom, Camera Raw (where we here at Mansfield Photography do most of our editing) or Photoshop has tools to adjust perspective and align lines, so the building or subject appears more natural and true to life. This is often the simplest and most effective solution.
Cropping: Refining Your Composition
Cropping is more than just cutting out parts of your image; it’s a powerful tool to enhance composition, remove distractions, and direct the viewer’s attention to the main subject. Proper cropping can turn a good image into a great one by tightening the focus and improving visual flow.
When to Crop Your Image
Here are a few situations when cropping can improve your photos:
Enhancing Impact
Cropping can help bring attention to details that might otherwise be missed. For instance, a close crop of a flower’s petals can highlight its texture and color, creating a more intimate and impactful photo.
Eliminating Distractions
Sometimes, there are elements in the background or edges of the frame that take away from the main subject. Cropping can help eliminate these distractions, keeping the viewer’s focus where you want it.
Re-Framing the Shot
You might realize that shifting the subject slightly off-center or placing it according to the “rule of thirds” makes the image feel more dynamic. Cropping allows you to adjust your composition after the photo is taken.
Tips for Effective Cropping
While cropping is flexible, overdoing it can reduce the quality of your photo, especially if you’re working with a lower-resolution image. Here are some tips for keeping your crops effective without losing image quality:
- Keep Your Resolution in Mind: When you crop significantly, you may lose resolution, making the image look pixelated or blurry if enlarged. Always try to shoot at the highest possible resolution.
- Use Cropping to Enhance, Not Fix: While cropping can improve a shot, it’s always best to try and frame your subject well in the original shot. This reduces the need for heavy cropping and keeps your images looking sharp.
- Experiment with Aspect Ratios: Sometimes changing the aspect ratio, like from 4:3 to 16:9, can make a photo more visually engaging, especially if you’re creating a specific mood or effect.
Bringing Perspective and Cropping Together
Perspective correction and cropping often go hand-in-hand to create polished, professional-looking images. For example, you might start by adjusting perspective to straighten lines, then crop to focus on the main subject. Combining these techniques lets you emphasize your subject’s best qualities while keeping distractions at bay.
Let’s say you’ve captured a wide-angle shot of a scenic street but notice that the buildings lean inward due to perspective distortion. First, correct the perspective to make the buildings appear upright. Next, crop the image to focus on the most interesting part of the scene, removing any unnecessary elements. This combination brings clarity, depth, and a sense of intention to your image, drawing viewers’ eyes to the focal points you’ve chosen.
Example 1
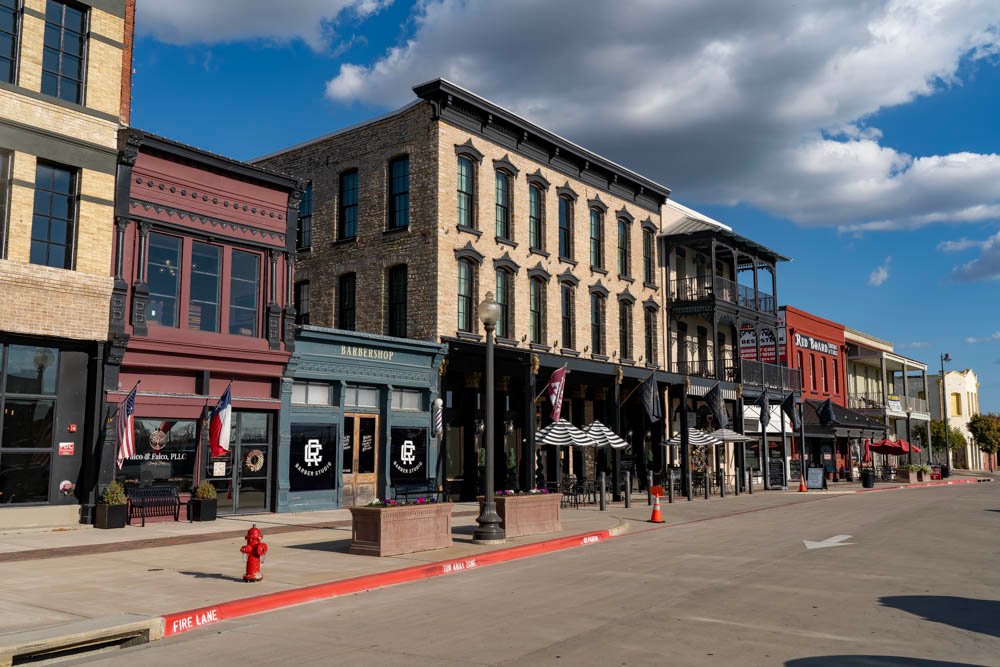
With our thousands of Small Town Texas images, perspective correction is required with nearly every image, and then minor cropping generally takes place as well. That’s how it is when you image geometric shapes like buildings. The image below was taken of a street in downtown Navasota, Texas. The image needs a perspective adjustment as it appears to be leaning backwards and inwards.
- At the left of the image needing adjusting, you can seen an incline to the right, and also an incline to the left on right side of the image.
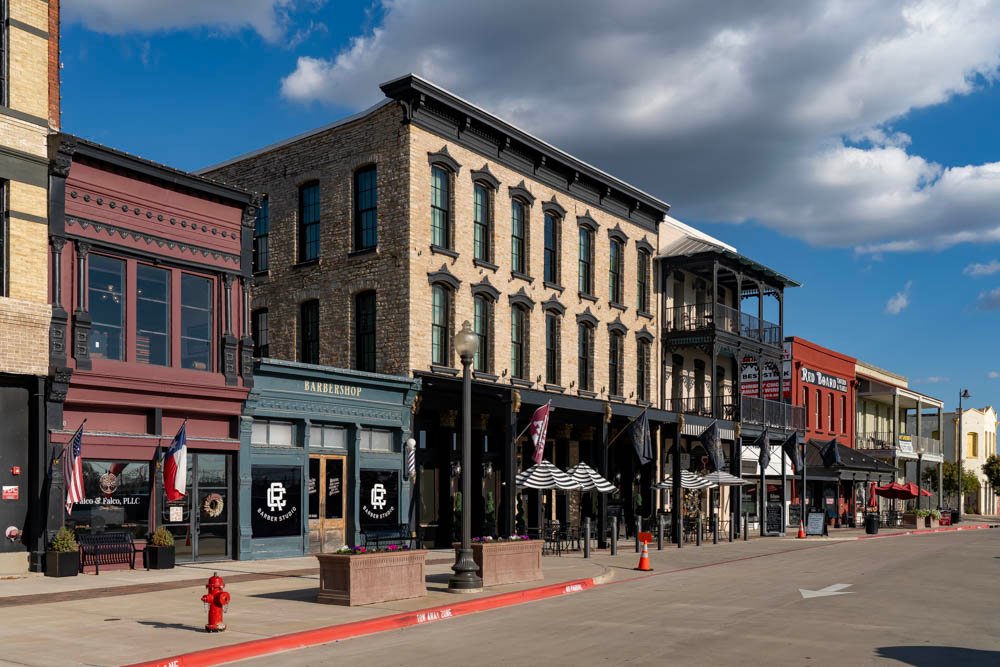
- Once the perspective was corrected, a small crop was added to make the building with all the windows the primary focus.
The adjusted image is the result after fixing the issues. The crop is nice, the lines on the buildings are straight, and does not appear to be leaning backwards.
Image that needs to be adjusted:
Adjusted Image:
Example 2
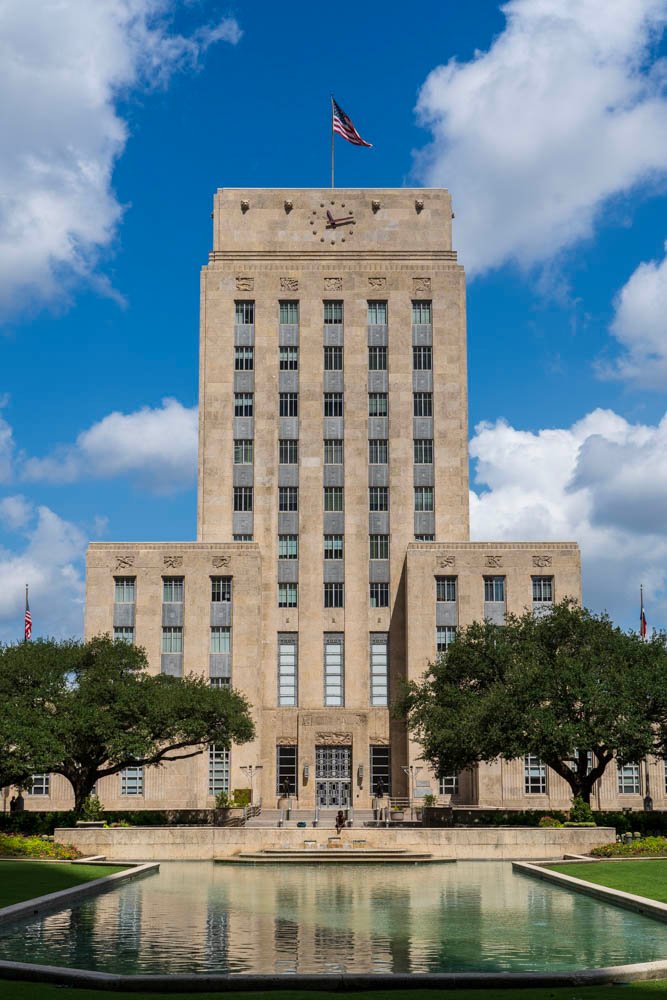
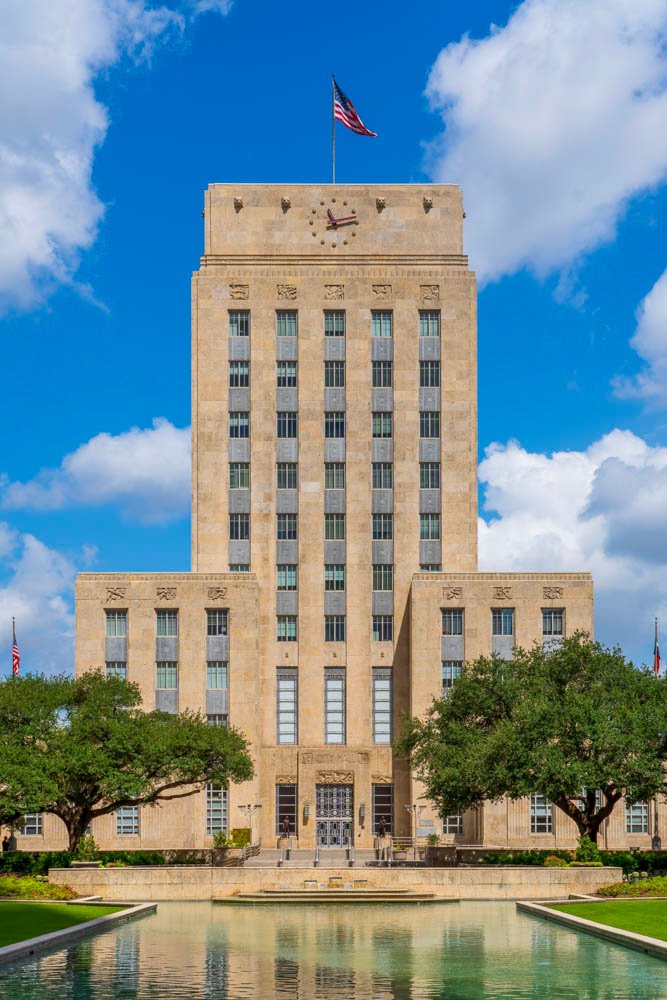
We’re in Houston, Texas, looking at City Hall. You can see in the before image, it appears to be leaning back. In the final image we adjusted the light & color and fixed the perspective so it appears straight and not leaning backwards.
Image that needs to be adjusted:
Adjusted Image:
Conclusion: Making the Most of Your Photos
Mastering perspective and cropping is a great way to enhance your photography without needing expensive equipment or complex techniques. By understanding how perspective affects the way objects appear in photos, you’ll be able to make small adjustments that bring out the best in each shot. Cropping can help refine the story you want to tell, guiding the viewer’s eye and keeping their attention where it matters most.
Whether you’re photographing towering architecture or intimate portraits, applying perspective correction and thoughtful cropping will elevate your images. The next time you’re out shooting, take a moment to think about how perspective and composition interact, and enjoy experimenting in post-processing. With these skills in your toolkit, you’ll be well on your way to creating photos that truly capture the beauty and essence of your subjects.

